
Windows Subsystem for Linux (WSL)
It's a fact, that at Raspberry Valley, we create stuff on single board devices: Raspberry Pi, Arduino and others. If they do have a system, they use some flavor of Linux. Raspbian on the Pi as a native system, Ubuntu Mate for ROS and robotics, and a few others. See our overview article OS for Raspberry Pi to learn more.
It is sometimes convenient though to develop on your notebook. We use Docker for some development, virtual machines for other. There is however a new kid in town: WSL (Windows Subsystem for Linux). If you have Windows 10, you can run one or several Linux distributions, which are 'baked in' into your system. No virtual machines, no extra software needed. We enjoy this feature very much.
WSL Overview
The Windows Subsystem for Linux (WSL) is a type of resource within the Windows operating system that allows users to run Linux command lines on a computer with a Windows operating system installed. This enables developers and others to work “natively” in a Linux environment when languages like Ruby or Python are more conveniently utilized through the Linux interface. Needless to say, it is a great productivity tool for administrators as well.
Microsoft has added a Linux kernel interface to their Windows kernel. The solution is not an emulator, neither a virtual machine. When an app tries to use the Linux kernel, it gets translated into a Windows native system call and any responses from the kernel is translated into a native Linux response. So the app thinks it's running on a Linux kernel and hence doesn't need to be modified. The great thing is you are also adding an extra layer over your Windows filesystem; in other words - use Windows to edit native files, while you can use WSL to run them.
If you head over to Microsoft Store, you can find a big selection of Linux solutions. The below example is just a small sample.
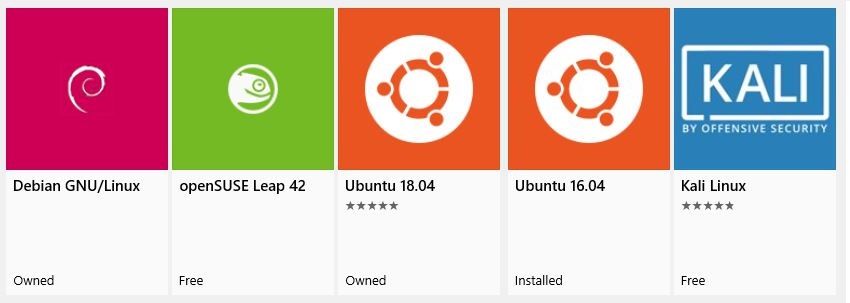
After you have installed your WSL Linux solution of choice, simply invoke it with the bash command.
Installing WSL
Before installing WSL, you need to enable it on your Windows 10. This can be done in many ways, though we find the official guide rather straightforward: Install the Windows Subsystem for Linux (Microsoft docs).
- To enable WSL, open up your PowerShell as administrator and type:
Enable-WindowsOptionalFeature -Online -FeatureName Microsoft-Windows-Subsystem-Linux
- Reboot
- Navigate to the Microsoft store and search for the name of your preferred Linux distribution
- Click the download button
- Once installed, open up a terminal application (Command prompt, PowerShell, other) and type
bash
Tips
Resetting WSL
You might have installed stuff you don't want to use anymore, or have simply forgotten your password. The fastest way to start from scratch is to reset your WSL instance. You can of course uninstall and re-install but this is faster and has the same result.
- Open Add or Remove Programs (System settings)
- Locate the Linux App you want to reset
- Click on Advanced Options
- Click the Reset button
Beware of your Windows Version
WSL is getting powerful. You can export and import images, run images from different locations, run windows applications from within your Linux subsystem (explorer, notepad ...), and much more. However these features are cutting edge and require latest Windows versions to work.
Some of the mentioned features in this Tips section come with Windows 10 version 1903 "April 2019 Update". So go ahead and check your version, and update if needed. If you're behind some corporate scheme (typically given you some oldest possible version for 'security reasons'), ask your admin and pray.
We will not mention the required Windows build in the actual tips. If they don't work, please update.
List Installed Distros
After fooling around a bit with WSL, you will have several distros installed - and possibly forgotten. It's not straightforward to search in the store (Installed Apps) or elsewhere to make an inventory of what is installed. You can however generate a list very easily, directly via WSL. Here is how.
- Open a new Command Prompt
- Run one of the commands listed below
For a complete list of distros:
wsl.exe --list --all or wsl.exe -l --all
Or for listing running distros:
wsl.exe -l --running
For example, here is the output from a system, where we have 2 distros, one of them running (Ubuntu), and one of them not:
$ wsl.exe wsl.exe -l --all
Windows Subsystem for Linux Distributions:
Debian (Default)
Ubuntu-18.04

$ wsl.exe -l --running
Windows Subsystem for Linux Distributions:
Ubuntu-18.04
Note: A distro won't show up in the list, if you have freshly downloaded it, and have not yet run it. You have to launch it at least once to setup the credentials.
Note: You can list your distros, set default versions etc. also via the command wslconfig
How to launch installed distros
Having multiple distributions on your system requires you to choose between which one you want to use. The first installed distro becomes default, and typing wsl.exe or bash.exe launches only the one. Here is a detailed description on how to launch individual instances of Linux: Manage and Configure WSL. However for daily use, or for configuring various shell enhancements, it's enough to remember the specific executable.
Say you have Ubuntu and Debian installed from the marketplace. In our case, you would launch them by choosing one or the other commands below:
ubuntu1804.exe
debian.exe
# if you type 'wsl.exe',  Debian will be launched (on our setup)
# if you type 'bash.exe', Debian will be launched (on our setup)
Launch WSL Shell from File Explorer
You can launch the WSL shell from the file explorer.
- Select any folder in Explorer and Shift+Right Click
- The menu which pops up shows: Open Linux Shell Here
Develop in your WSL using Windows Tools
It's rather amazing, how this inter-OS cooperation works. Imagine you have an envirnment somewhere within your WSL and you want to continue using your Windows tools to edit the files, launch utilities etc. Here's how.
Once you are in your WSL folder with the files you wish to edit, try this launching notepad to edit some file. Within your bash, type:
notepad.exe myfilename.txt
You might also invoke Visual Studio Code for the current folder, to work on all files:
code .
Read more about WSL and Visual Studio Code.
Use Windows Tools in your WSL Session
You can use Windows tool to work with WSL files, and you can embed functions from Windows into your WSL. Works both ways. You can even mixup the tools used, all in one command-line. This is pretty awesome.
It's enough to remember, that when you launch the WSL bash, the Windows path is included into the WSL linux path. This gives you access to many features. Further, Windows binaries must include the file extension, match case and be executable.
Fire-up the WSL bash and try the following:
ipconfig.exe
Similarly, try getting the Windows host version from your bash:
cmd.exe /c ver
Keep on experimenting. Once you wrap your head around this feature, there's no going back!
Read more about setting up Linux development in Windows in this great article: An In Depth Tutorial on Linux Development on Windows with WSL and Visual Studio Code
Background Tasks
As of recent Windows builds (17046), you can launch background tasks in WSL. This is good news for running various server tasks and more.
Read more on Background Task Support in WSL
Backing up your Distros
Imagine you have configured your WSL to your liking and want to reproduce the experience again and again. The new features of WSL Import/Export come to your rescue
There's more scenarios available with this update:
- Backup distros and restore them on other machines
- Stop using your local hard drive and move the distros elsewhere to save space on your main drive
- Recover from failures, speed up testing
You can read more about the details if needed in this blog post: Export and Import WSL Linux Distro in Windows 10
Find the Linux Distribution Name
If you're like us, you have installed the majority of WSL systems available. For testing, for checking features or simply for separating your key solutions / developments.
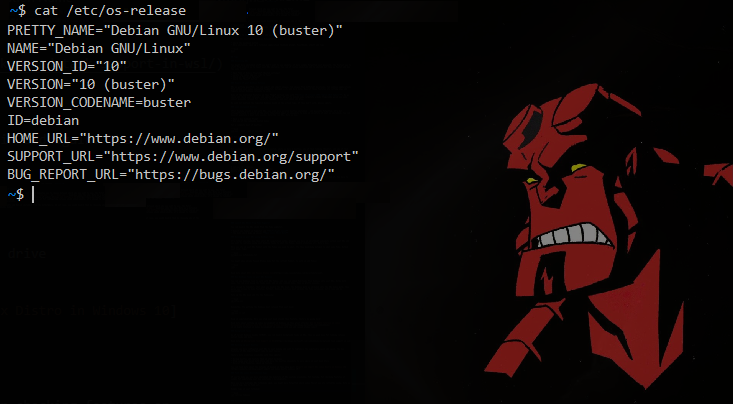
Once you have multiple WSL terminals open, you might have forgotten which Linux flavor you are currently using. Here is a quick tip, how to find out.
Simply type in your terminal:
cat /etc/os-release
You will get a response similar to this:
Running GUI apps
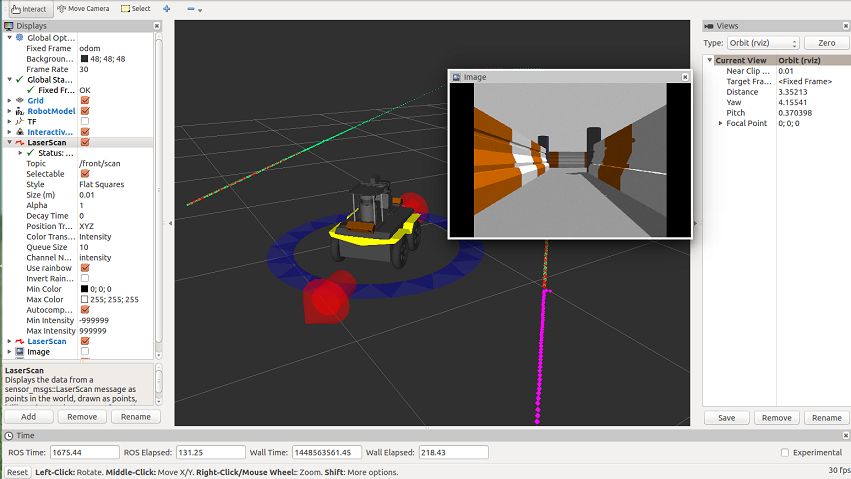
We have to say, that as of this writing this feature is not fully supported yet. However, we have tested many graphical apps which worked anyway. Remember - WSL is not a full Linux installation. So beware - there are limitations.
Typically, you would need an X server on your host machine (your Windows 10) and enable your GUI application to find that server. See an example in our ROS on Windows 10 guide, where we happily play with the turtle robot using this feature (notice also, how the display redirecting is set up).
Here are some X servers worth mentioning:
- Xming - an all time favourite
- VcXsrv
- MobaXterm - you probably noticed MobaXterm is our tool to go in many scenarios. It also runs an X Server out of the box, which we found very convenient. Read more about MobaXterm in our article Remote Access to Raspberry Pi
To test the feature, go ahead, login to your favourite distro, and (in the bash) install x11-apps. These are great samples for testing the features.
sudo apt install x11-apps
Once done, fire up your preferred X server on the host, and then back in bash, run the following:
export DISPLAY=:0
xeyes
If you did everything correctly, you are now in business :)
Running GUI apps - Visual Studio Code on WSL
Let's do something more cool than running XEyes. You can test your new skills on running a Linux version of Visual Studio Code. It's not completely obvious on how to install it in Linux, so first, fire up your bash and follow the commands below to get code installed.
# Download the Linux .deb package from: https://code.visualstudio.com/download
# Transfer the file to your distro of choice. We assume you run the below in the directory where the file is located

# setup pre-requisites
sudo apt-get install libgtk2.0-0 libxss1 libasound2
sudo dpkg -i <vscode-filename>.deb
sudo apt-get install -f
Once you are done, expose your Display, launch the X Server on the host and launch Visual Studio Code
export DISPLAY=:0
code
Points of interest:
- If you have Visual Studio Code installed on your host, you will be warned about this. You'll see something similar to the below. Just say Yes.
To use VS Code with the Windows Subsystem for Linux, please install VS Code in Windows and uninstall the Linux version in WSL. You can then use the 'Visual Studio Code' command in a WSL terminal just as you would in a normal command prompt.
Do you want to continue anyways ? [y/N]
- I suppose you will install Visual Studio Code, 'because you can'. However consider if you actually need it. If code is on the host machine, we have more simple tips to use it for both environments.
WSL and ROS
You can run ROS on your Linux subsystem. This is an excellent choice for quick development and debugging. See our dedicated guide here: ROS on Windows 10.
Default distribution
So the time has come: you have installed several distros on your Windows. When you bash into your Linux, which one is actually chosen? Well - it's your choice. You need to select a "default distribution".
For configuring default distributions, among other things, you can use the command line utility wslconfig. Read more here. Basically all you have to do is to launch it with the correct parameters - type the following (on Windows) to see the syntax guide:
wslconfig.exe
Finding the Home directory on the Windows 10 host
We have an overlay system on top of Windows 10 when we launch Ubuntu or any other distro via WSL. So the obvious question is - where are my files located on the host system?
The answer is not always so clear. It seems that the location is changing in appdata, based on factors unknown to us. What we found works best:
- Go to your home directory on the WSL distro
- Create a file (any file) with a good to remember name
echo "hello" > myeasytorememberfilename.txt
- Go to your Windows filesystem (appdata) and use the search feature for "myeasytorememberfilename.txt"
- Once found, right click and select open file location
- Mark the folder (make a shortcut) for future use
WARNING: it is a bad idea to edit files from your WSL directly in Windows. PLEASE DON'T !!!
Midnight Commander Fix
It may happen that your MC does not recognize arrows or tabs in the console. While working well in some cases (say in PowerShell), it does not work in others (in our case the excellent Cmder). Most probably, you need to change the WSL launch command.
# instead of this:
%windir%\system32\bash.exe ~ -cur_console:p to %windir%\system32\bash.exe ~ -cur_console:p

# use this command (notice the extra 'p5' at the end)
%windir%\system32\bash.exe ~ -cur_console:p to %windir%\system32\bash.exe ~ -cur_console:p5
Installing Commonly Used Solutions
Often, installation of solution X is either problematic, or messy on Windows (10). Linux however makes such an installation a breeze and on top, you can always reset the WSL machine into a clean state, leaving no remains of a solution you tested.
We use WSL for our experiments a lot. Here are a few ideas and recipes to get started in commonly used scenarios.
Ansible
You can run a problematic Windows 10 installation of Ansible, or simply use WSL and get it in minutes. Here is the installation script:
sudo apt-get update
sudo apt-get install software-properties-common
sudo apt-add-repository ppa:ansible/ansible
sudo apt-get update
sudo apt-get install ansible
Tested in Debian, should work elsewhere as well. Go ahead, start building your automation scripts immediately!
If you are starting with Ansible, you will probably need a few more installations on your WSL Ansible machine
# install ssh if not available: we didn't find it on our Debian machine
sudo apt install openssh-server
# if you don't start immediately using ssh keys, you will be using the "--ask-pass" switch a lot.
# if this is the case, you need to install sshpass
sudo apt install sshpass
CoAP
We have described CoAP briefly in our CoAP Getting Started Guide. Related to WSL, here is the extracted installation script.
git clone --depth 1 --recursive -b dtls https://github.com/home-assistant/libcoap.git
cd libcoap
./autogen.sh
./configure --disable-documentation --disable-shared --without-debug CFLAGS="-D COAP_DEBUG_FD=stderr"
make
make install
Tested in Debian, should work elsewhere as well. You can automate your home immediately after. Or connect to IoT devices supporting this protocol.
Links
Our WSL articles:
Useful links:
- About WSL (Microsoft docs)
- Install the Windows Subsystem for Linux (Microsoft docs)
- Microsoft WSL Blog - mixes up entries about console, WSL and related topics. A must-link
- A Guide to Invoking WSL
- The Windows Subsystem for Linux Guide - a bunch of tips on WSL (you can find the site guthub pages here)
- Using WSL and MobaXterm to Create a Linux Dev Environment on Windows - this is a good overview of some WSL logic vs. running graphical apps using X server. Covers MobaXTerm (we love that tool), Visual Studio Code on WSL, Sublime and Docker notes
- WSL Productivity Tips
- WSL - Starting Linux Background Services on WIndows Login
- awesome-wsl - a curated list of links and info snippets related to WSL
- LxRunOffline - if you want to do serious management of your distribution, try this tool!