Cambox - Introduction
Introduction to CamBox - the project for capturing video and images with a Raspberry Pi, Camera and a PIR sensor.
Such projects have a simple premise: have a motion triggered camera to record wildlife, both day and night (or serve as a security camera). If you wish to search for inspiration, try also trailcam.
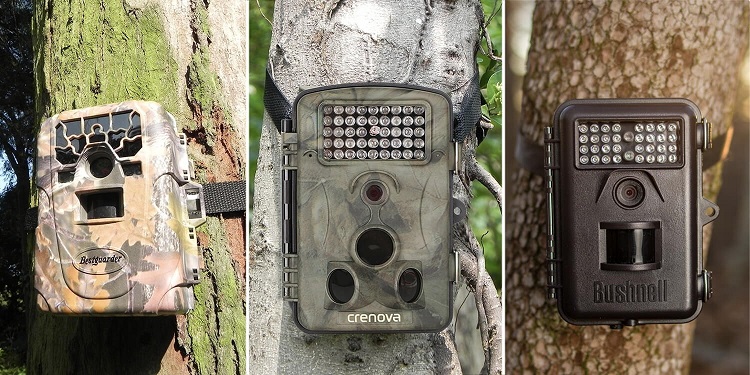
There are quite some off-the-shelf trailcams available, but we are here to create and improve stuff, right?
Cambox Setup
The CamBox guides are broken down into multiple sections. Step by step we build and improve the appliance. You can follow those articles elsewhere, the sequence start-to-end is as follows:
- CamBox Introduction (this article)
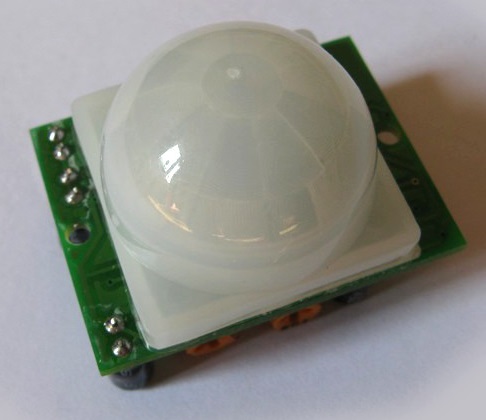
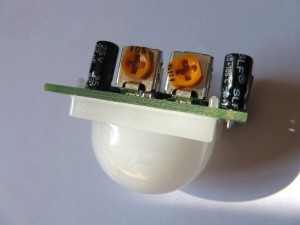
- Connect the PIR sensor - we start with a new Raspbian and attach the first hardware - the movement detector. This is the second step for our Cambox project. It is time now to plugin the PIR motion sensor and test it out. You can find a detailed description on how to do this in our article Connecting the PIR Sensor
- CamBox - Mounting the PiCamera - we attach the camera of our choice, in this case the PiCamera. This is the third step for our Cambox project. Obviously any other USB Camera or similar can be used instead. You can find a tutorial on how to handle this steps in the article Mount PiCamera
- In the fourth step of our project, we will Connect the PIR sensor to the Camera and gather some screenshots whenever a movement is detected. Check the below section Modifying the PIR Sensor code for details.
- [optional]: Setup WIFI on Raspberry Pi - You might wish to add a WIFI dongle and configure your PI to be more mobile
- [optional]: Disable Red Led on Raspberry Pi Camera - whenever you take a screenshot, the red led on the PiCamera blinks. You can disable this behavior, though with a properly designed enclosure, this might not be necessary
- Autorun Python Script - It's time to make sure your working and tested (and optimized) program is lauched whenver the Pi boots
Modifying the PIR Sensor code
This section describes in detail how to modify the PIR code described in Connecting the PIR Sensor to achieve functionality required by our Cambox project. This is step four of our project outlined in the above section.
In the previous sections, we have connected the PIR sensor to the Raspberry PI and we have also attached the Camera. The PIR sensor is working and throwing console messages. This section now extends the Python script and on every movement triggers a screen capture.
Modifying the PIR code
Basically, all we have to add is a small piece of code which stores the camera image whenever movement is detected. As we are testing, it stores into the current directory. So we need to add the following code somewhere, and add handling of filename generation (we do not wish to overwrite the current picture again and again).
The code fragments to add look something like this:
- Initialize Camera
piccounter = 0
camera = picamera.PiCamera()
camera.resolution = (1024, 768)
camera.hflip = True
camera.vflip = True
- Capture Image
# capture image now
camera.capture('image' + str(piccounter) + '.jpg')
piccounter = piccounter + 1
That's it. Our new code may look something like this:
New Code
#!/usr/bin/python
#+-+-+-+-+-+-+-+-+-+-+-+-+-+-+-+-+-+-+-+-+-+
#|R|a|s|p|b|e|r|r|y|P|i|-|S|p|y|.|c|o|.|u|k|
#+-+-+-+-+-+-+-+-+-+-+-+-+-+-+-+-+-+-+-+-+-+
#
# pir_2.py
# Measure the holding time of a PIR module
#
# Author : Matt Hawkins
# Date   : 20/02/2013

# Import required Python libraries
import time
import RPi.GPIO as GPIO
import picamera

# Use BCM GPIO references
# instead of physical pin numbers
GPIO.setmode(GPIO.BCM)

# Define GPIO to use on Pi
GPIO_PIR = 7

print "PIR Module Holding Time Test (CTRL-C to exit)"

# Set pin as input
GPIO.setup(GPIO_PIR,GPIO.IN)      # Echo

Current_State  = 0
Previous_State = 0

try:

  print "Waiting for PIR to settle ..."

  # Loop until PIR output is 0
  while GPIO.input(GPIO_PIR)==1:
    Current_State  = 0

  print "  Ready"

  piccounter = 0
  camera = picamera.PiCamera()
  camera.resolution = (1024, 768)
  camera.hflip = True
  camera.vflip = True

  # Loop until users quits with CTRL-C
  while True :

    # Read PIR state
    Current_State = GPIO.input(GPIO_PIR)

    if Current_State==1 and Previous_State==0:
      # PIR is triggered
      start_time=time.time()
      print "  Motion detected!"
      # Record previous state
      Previous_State=1
      # !!! modified pir_2.py here !!!
      # capture image now
      camera.capture('image' + str(piccounter) + '.jpg')
      piccounter = piccounter + 1
    elif Current_State==0 and Previous_State==1:
      # PIR has returned to ready state
      stop_time=time.time()
      print "  Ready ",
      elapsed_time=int(stop_time-start_time)
      print " (Elapsed time : " + str(elapsed_time) + " secs)"
      Previous_State=0

except KeyboardInterrupt:
  print "  Quit"
  # Reset GPIO settings
  GPIO.cleanup()
Parts
What we need to get started is rather trivial:
- Raspberry Pi (showing Raspberry Pi 3)

- PIR sensor
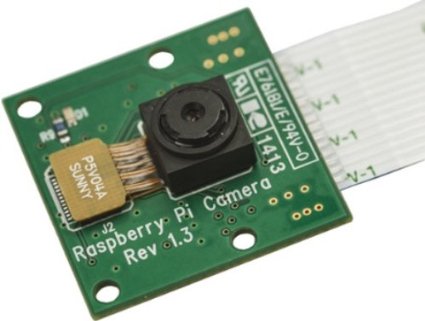
- Raspberry Pi Camera
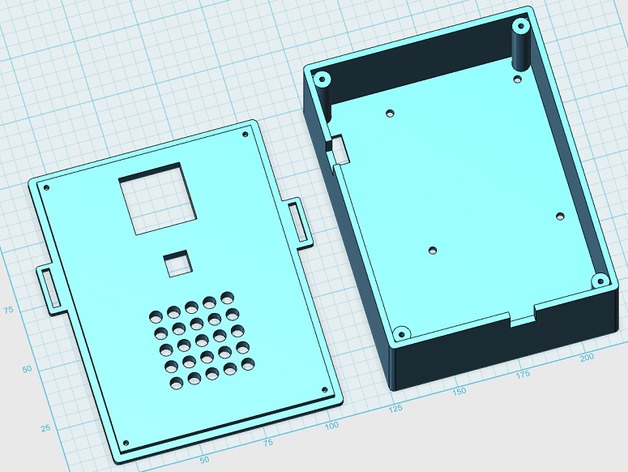
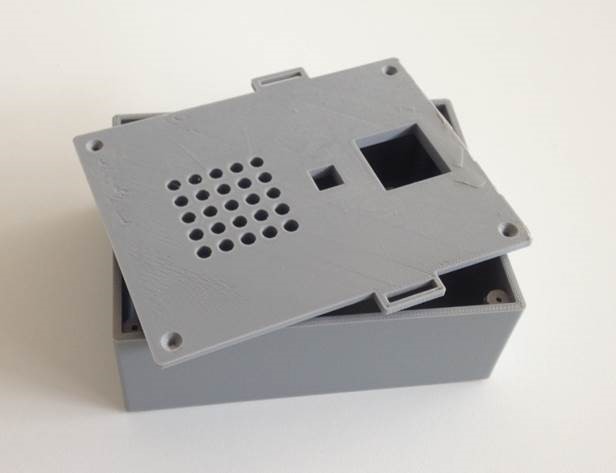
- An Inclosure: Anything will do, see the inspiration section. Below is my Iteration 01 3D Printout of Thingiverse Trail Cam
Inspiration
I wanted to make something similar to Nature Bytes camera kit. See below the enclosures.
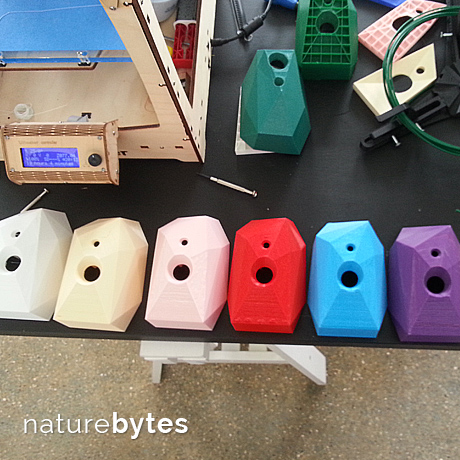
The first prototype is built on top of an open source model from tiaanwessels found on thingiverse.