
Introduction
The key feature of PiBakery is the ability to create a customised version of Raspbian that you write directly to your Raspberry Pi. This works by creating a set of scripts that run when the Raspberry Pi has been powered on, meaning that your Pi can automatically perform setup tasks, and you don't need to configure anything.
The scripts are created using a block based interface that is very similar to Scratch. If you've used Scratch before, you already know how to use PiBakery. Simply drag and drop the different tasks that you want your Raspberry Pi to perform, and they'll be turned into scripts and written to your SD card. As soon as the Pi boots up, the scripts will be run.

Installation
There are two ways to download PiBakery, either by using the installer for your platform, or by downloading the source. The installer option is the easiest, but be aware that the download is rather big (1.3 GB for Windows) as it contains a complete Raspian system. However, current versions in the making actually separate the Image from Pibakery, making the download much more manageable.
Downloads can be found at Download PiBakery site
Documentation
The PiBakery Documentation page is really good and will give you all information needed.
Tips
Developer Inspector
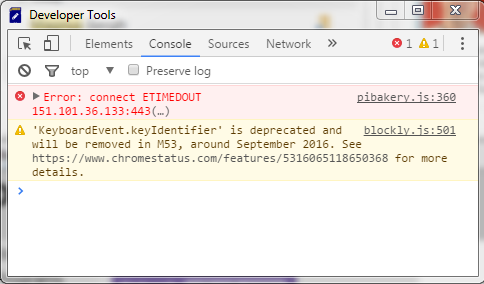
If you encounter problems with PiBakery it is a good idea to launch the Developer Inspector. This is done by the keyboard shortcut ctrl-shift-i. Once opened, select Console in the inspector to see any errors or messages.
Problem writing to SD card (Windows environment)
If you encounter problems when writing to SD Card, e.g. nothing happens when you click on the Write button, the reason might be missing information in the System Variables. System variable Path should include C:\windows\system32\wbem;
Have you forgot how to find and edit the System Variables? No problem, this link will help you out!
Links
- DietPi - another approach to pre-configure your SD card