
Setup SD Card
This is a small guide desribing, how to prepare your SD card, before you insert it into your Raspberry Pi device. The approach can be used to setup most other single-board computers, obviously with a few tweaks here and there.
We assume you are running Windows on your notebook (where you prepare the card before using it).
Download the latest Raspbian Image
First, go online and download your preferred image to your computer. For Raspberry Pi, the dedicated, Debian based system called Raspbian is always a safe choice. You can download it here: Raspbian Download Page. We have a dedicated page focusing on other system images available if you want to choose a different brand: OS for Raspberry Pi.
Wait a bit and extract the downloaded image someplace on your system.
Download Burning Tools
Now you need a tool to 'burn' the SD card image. Basically whichever tool you choose, it takes a pre-made image (acquired in the previous step) and writes it to your SD card, byte by byte.
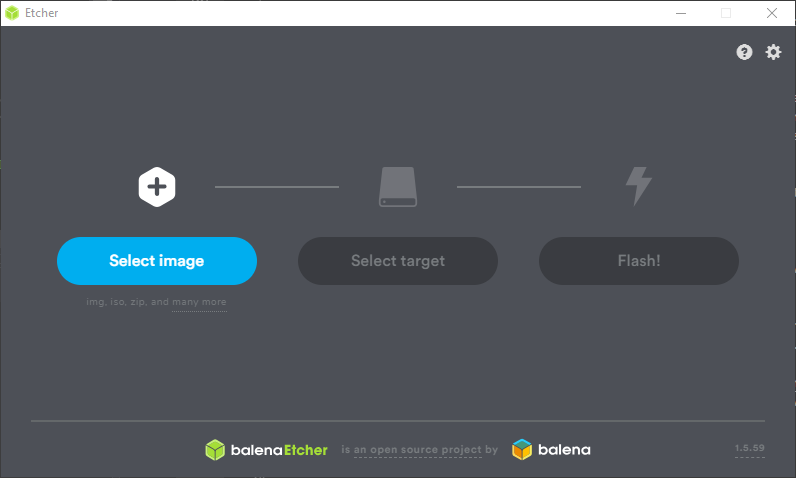
For the purpose of making SD card images, we use a very user-friendly tool called Balena Etcher. Go ahead and download it. The rest of the guide uses this tool.
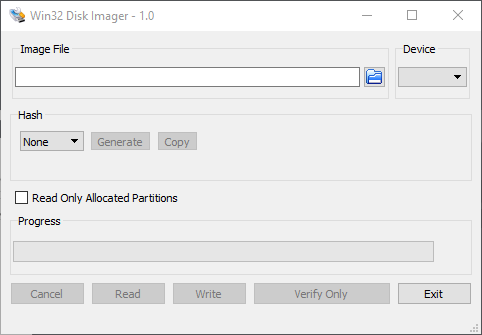
If you need more features, we recommend Win32 Disk Imager instead. This tool is maybe not so nice looking, but apart from creating images, it provides the extra functionality of creating images, and is significantly smaller. Anyway, your choice.
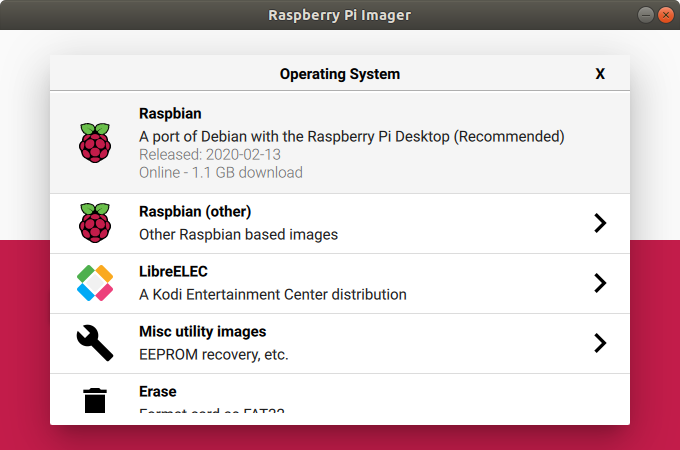
Possible, you might want to use other alternatives. You can check out the official Raspberry Pi Imager tool - works for Linux/Windows/Mac.
Burn the Image
Time to burn! Make sure you have your Etcher running, you know where your previously downloaded image is located and you have an SD card ready.
- Start Etcher
- Insert the SD card into your notebook
- First select the image you have downloaded ('Select Image'), then the SD card location ('Select Target'). It's a good idea to validate this twice, so that you don't damage your other connected storage
- Click 'Flash!' and wait a bit. Your image is being created
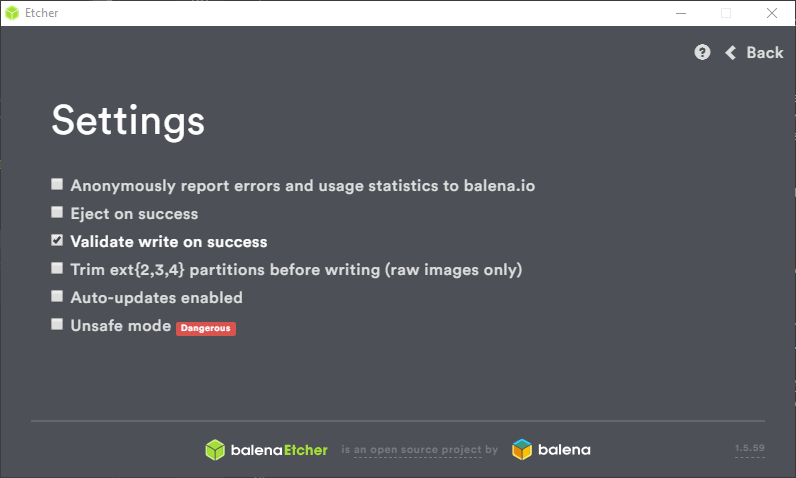
Note: Etcher default settings eject the SD card once it has been written (and verified). As we will need to edit a few files, either re-insert the SD card once it was written, or setup the Etcher options (by unselecting 'Eject on Success'), as shown below:
Setup SSH Access
As of the November 2016 release, Raspbian has the SSH server disabled by default. You will have to enable it manually in the terminal. For our scenario or headless setups, SSH can be enabled by placing a file named 'ssh', without any extension, onto the boot partition of the SD card. Please do so now, otherwise your SSH connection below will not work!
- Open the root folder of your SD card and add an empty text file named
ssh- no extension
Setup WIFI
This step is optional. If you wish your image to immediately connect to Wifi, follow the below steps. While you can setup Wifi later, you can only do so if connected to the Pi. Not so easy with a Raspberry Pi Zero for instance.
Make sure you know your Wifi configuration. Create a file on the SD card - wpa_supplicant.conf (again, in the root folder), where you configure your connection details. Below is an example configuration, please modify your location and SSID name / password.
country=SE
ctrl_interface=DIR=/var/run/wpa_supplicant GROUP=netdev
update_config=1

network={
    scan_ssid=1
    ssid="MySSID"
    psk="MyPassword"
}
Replace ssid and psk with your own network SSID name and password respectively. You might also want to replace the country code - country - with the code appropriate for your location. Here is a list of country codes available.
NOTE: anytime you wish your device to connect to a new location, just repeat this step: add the supplicant file, containing the new network setup, directly to the image root folder. On boot this configuration is copied over the previous setup. Very nifty and helful when you move around a lot and connect to different networks.
Setup USB Access
This step is optional.
You can setup your Raspberry Pi as a USB connected device (USB Dongle, Ethernet Gadget .... there are many names to this in the community). In order to do so, you need to modify two extra files: config.txt and cmdline.txt.
Guide coming soon. In the meantime, try to see how it's done for instance here
First-Time Boot
There is really not much to do now, other than testing your SD card for the first time.
- Safely Eject the SD card from your PC
- Insert the card into your Pi (a good idea is to check that there is no power)
- Attach power and boot
If you have a display connected, then you should see a bunch of text appear as your Pi boots.
Booting for the first time will take a few minutes to get everything set up. If you're doing this headless, i.e. without a monitor and keyboard connected, then wait for a good 5 minutes or so before proceeding.
Because we provided the credentials for the Wi-Fi network, your Pi should have connected to it. You can use an app like Fing to check that it is connected and to find its IP address. If you scan from your PC, we prefer to use netbscanner. Up to you of course - any tool will do.
First-Time Boot with Bullseye and later!
The above guide is well tested on images prior to Bullseye. Please be aware, that new images DO NOT use the standard username / password and that running the burnt image headless won't work for you anymore: on first launch, Raspberry Pi OS runs a wizard to configure things, including mentioned username and password.
To bypass this feature, you can:
- Write to the SD card using Raspberry Pi Imager: During the image selection process, you can setup credentials and other features
- Add a user configuration text file, userconf or userconf.txt, to the root of the burnt image file. See more details here.
Basically, the configuration file is a simple one-line text file, containing username:encrypted-password on the first line. To get the encrypted password string, user another Pi for instance and run the following:
echo 'mypassword' | openssl passwd -6 -stdin