
Introduction
An important hat for our makerspace is the Sense HAT. This page summarizes it's features and use.
The Raspberry Pi is in itself a great device capable of many things. Given it has such a small size, it is portable and can connect immediately to the Internet, we can do many projects out of the box. It can be further enhanced with sensors and electronics gadgets to interact with the world - via it's GPIO ports.
To extend the features with ready-made gadgets, you can acquire a 'HAT'. HAT stands for 'Hardware Attached on-Top'. A popular and powerful HAT is 'Sense HAT' - a suite of sensors which allow the Raspberry Pi to sense the world around it, including an array of LEDs on top suited for displaying any information. On top a small joystick is attached.
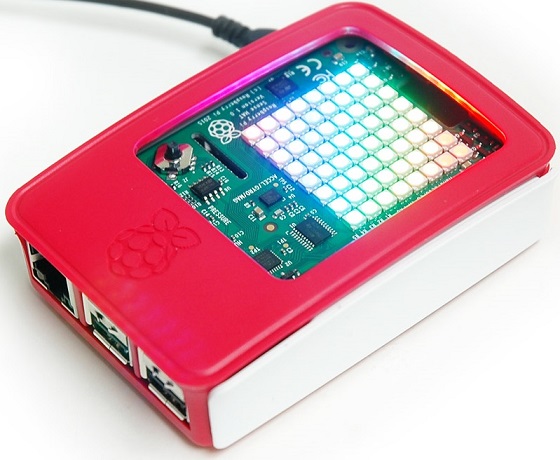
Here is a list of all sensors attached to Sense HAT. As mentioned it also features an 8x8 LED matrix and a mini joystick
- Gyroscope
- Accelerometer
- Magnetometer
- Temperature
- Humidity
- Barometric pressure
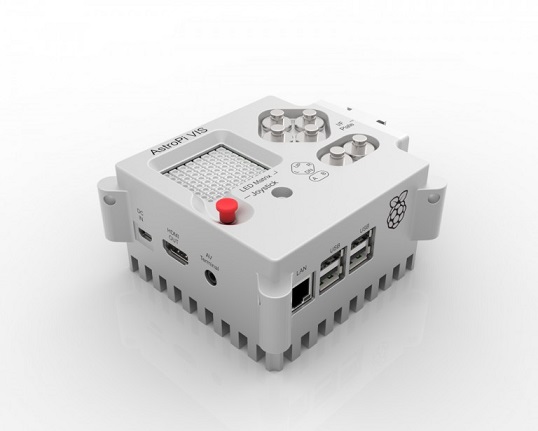
Please note: this hat together with 2 Pis has gone to space! Please check the Astro Pi Project - a great example of merging education / interest of young students with the British space program. The device below is one of the 2
Installation
In order to work correctly, the Sense HAT requires an up-to-date kernel, I2C to be enabled, and a few libraries to get started. Note that my vanilla Raspbian System already included all, but just in case your distro has them missing.
- Update your system
sudo apt update
- Install the Sense HAT package which will ensure the kernel is up-to-date, enable I2C, and install the necessary libraries and programs
sudo apt install sense-hat
- [optional] Some authors claim you need also to ensure compatibility with Python 3 by adding the 'Pillow' package
sudo pip install pillow
- A reboot may be required if I2C was disabled or the kernel was not up-to-date prior to the install
sudo reboot