
GPIO and Scratch on Raspberry Pi
You have your brand new Pixel setup on your Pi. Now it's time to start controlling your servos, leds and other stuff connected to the Raspberry Pi GPIO pins. So you fire-up Scratch and it doesn't seem to work as advertised! While Scratch does support GPIO out of the box, it is more complex that it should be.
This guide will help you setup Scratch for controlling GPIO in a much more elegant way
There are several ways to get GPIO support into your Scratch (Scratch 2) environment. Those are listed below, though we recommend using the GPIO Plugin (if you happen to use Scratch 2).
GPIO Plugin for Scratch 2 [recommended]
This is the recommended approach. Basically Scratch 2 now supports plugins in the blocks area, allowing 3rd party blocks to be used. To read about the whole process, go here
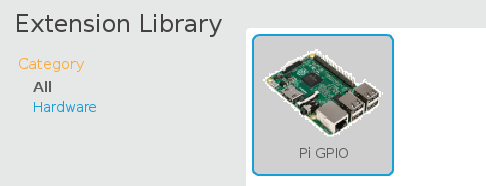
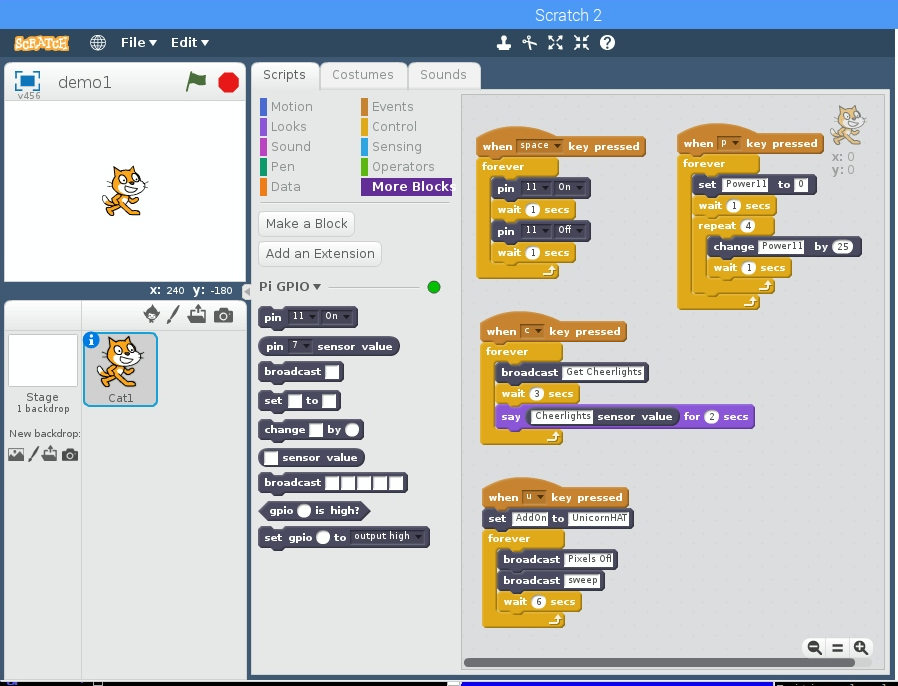
All you have to do to add GPIO functionality: first click ‘More Blocks’ and then ‘Add an Extension’. You should then select the ‘Pi GPIO’ extension option and click OK.
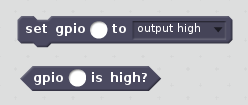
Once added, you can use these beautiful blocks in your code:
Official GPIO Support for Scratch
Truth be said, you can control GPIO out of the box with any recent release of Raspbian / Pixel. However controlling the pins (via Broadcast blocks) is a bit daunting. If you wish to stick to the standard though, here is an introduction on the official Raspberry Pi site: Scratch GPIO
Scratch GPIO addon
Enter Cymplecy Scratch2GPIO. This modification (extension) of Scratch allows you to use Scratch much more intuitively.
To install, just run the following 2 commands (yes 2, that's it)
wget http://goo.gl/Pthh62 -O isgh5.sh --no-check-certificate
bash isgh5.sh
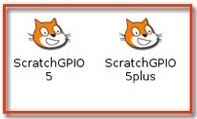
You're done. There are 2 new icons on the desktop, choose any one of those and start hacking. To get some inspiration, you can try for instance a Scratch and GPIO Blinky Tutorial
Links
- Scratch GPIO - Official GPIO support for Scratch
- Scratch for Raspberry Pi
- Scratch and GPIO Blinky Tutorial
- Cymplecy Scratch2GPIO