BME680 Sensor
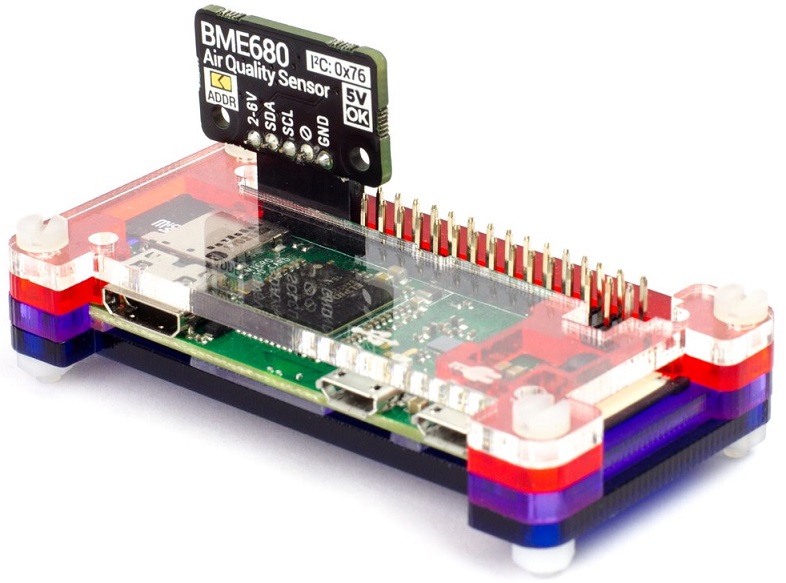
We always have a need to process sensor data. This page describes the Bosh BME680 Sensor, a temperature, pressure, humidity and air quality measurement device. We implemented it via the Pimoroni BME680 Breakout Board, as seen in the introduction picture.
"BME680 is an integrated environmental sensor developed specifically for mobile applications and wearables where size and low power consumption are key requirements. The BME680 integrates for the first time high-linearity and high-accuracy gas, pressure, humidity and temperature sensors.... Gases that can be detected by the BME680 include Volatile Organic Compounds (VOC) from paints (such as formaldehyde), lacquers, paint strippers, cleaning supplies, furnishings, office equipment, glues, adhesives and alcohol." [Bosh]
Using the Sensor
Using the sensor on a Raspberry Pi (Raspberry Pi Zero) is a breeze, thanks to the libraries provided. Both Bosh (C Library) and Pimoroni (Python library) have prepared the code well.
To install, just download/clone the appropriate repository and follow instructions provided. We tested the Python library for the breakout board.
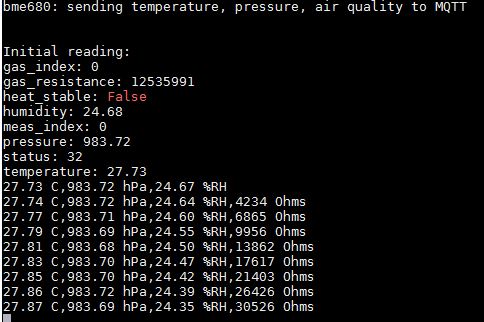
After installing the library, you can try running some examples provided. The below is output based on the (modified) example named read-all.py. We have actually taken the code to the next level by plugging it into our MQTT reader network. More on this below. But the example output vs. the modified output are very similar.
Extending Sensor features
You can plug in the sensor (either the breakout board or any other solution from other vendors) into your code and your solution starts working. However what we have designed here is a pub/sub MQTT framework for sensor coordination and display. We considered using ROS for a long time, but finally decided to roll our own, based on the IoT Raspberry Pi Device we created earlier.
Our solution allows us to decouple sensor readings, or combine sensor readings with other solutions, and process them separately in NodeRED and NodeRED Dashboard. After some simple wiring of nodes, we get nice results immediately.
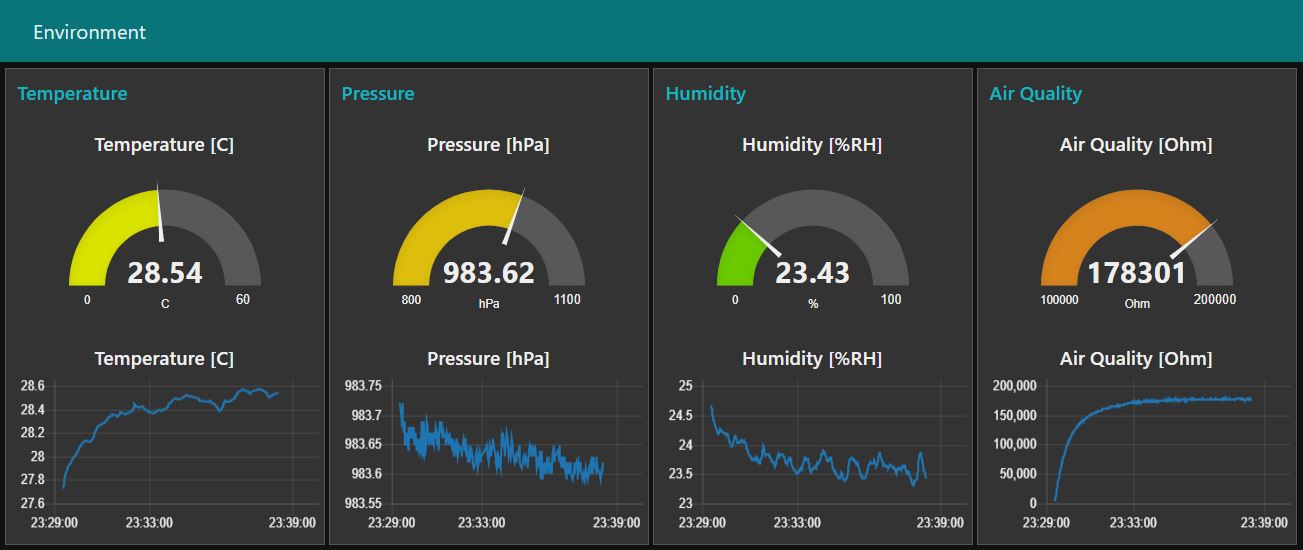
It's easy to combine the handling of our BME680 sensor with any action desired. Note the temperatures are a bit skewed / the sensor is sitting directly on our prototyping board.
Points of interest
- Check the documentation: Pimoroni suggests, after their testing, to burn-in the sensor for around 20 minutes. We agree
- The sensor location on the breakout board is great for prototyping, but of course consider positioning the sensor board further away from your Pi. The readings are influenced by the load on the device of course.
Links
- Bosh BME680 Sensor
- Bosh C Library on Github
- Pimoroni BME680 Python Library on Github
- Pimoroni BME680 Breakout Board
Our sensor articles:
- Connecting the PIR Sensor - motion detection sensor (passive infra-red)
- RCWL 0516 Microwave Radar Sensor- motion detection sensor (microwave - radar)