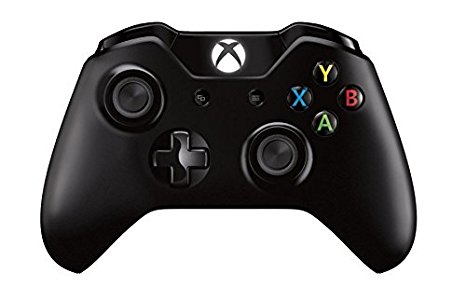
Map Bluetooth Controllers using Python
Everything is better with Bluetooth.
This article describes mapping of Bluetooth (BT) controllers on Raspbery Pi, using Python. We assume you are using Raspberry Pi 3 with a Bluetooth chip onboard (if you are using an earlier Pi, the process requires some extra steps, like adding a Bluetooth dongle and configuring it).

Why should I care? There are many use-cases for this: you might want to controll a Pi car with a Playstation Controller via BT, you might want to add a BT controller to your media player or retro gaming console. And more.
Getting Started
First, get a fresh Raspberry Pi 3 install. We assume you are running headless or from the command-line. No Windows needed :)
- Setup your headless device: try one of our tutorials: Raspberry Pi Headless Setup or maybe DietPi. There are many options
- SSH into your device, over the LAN
Pairing your device
The first thing we need to do is to pair our Bluetooth device with the Pi. You can do this section only once. Your PI will remember the paired device from now on.
- Launch the BT control application
sudo bluetoothctl
- Still within bluetoothctl, enter the following commands to make sure Bluetooth is configured correctly
power on
agent on
default-agent
- Let us now scan all Bluetooth devices (still in the command prompt of bluetoothctl). If you can't locate your device, just switch it off, scan and switch it on again and compare the found devices.
scan on
Locate your device, and write down the device ID. It will be in a format similar to this:
XX:XX:XX:XX:XX:XX
- Finish pairing with the following command (still in the command prompt of bluetoothctl).
pair XX:XX:XX:XX:XX:XX
- Finally, exit the BT control application and return to the console
exit
Troubleshooting:
It might happen, in rare cases, that you get a connection error. In such a case, it is a good idea to remove the device, then repeat the process described above. In the worst case scenario, remove the device first, then scan and before pairing, trust the device first. The whole process (worst case scenario) can be done as follows:
remove XX:XX:XX:XX:XX:XX
scan on
trust XX:XX:XX:XX:XX:XX
pair XX:XX:XX:XX:XX:XX
Test Paired Device
We are going to use a great utility, written in Python, to simplify our tests: evdev. The following sequence of commands assumes you are having a vanilla system with core Python. It might be you have installed some of the tools for other projects - no worries, repeating the commands won't hurt your Pi.
- Install evdev (via pip: this example installs pip as well)
sudo apt install python-dev
sudo apt install python-pip
sudo pip install evdev
- Run a built-in evdev script to identify the behavior of your paired device (you need to select it first). Try to make sense of the output: you will see a lot of stuff printed out, some of which doesn't matter for this tutorial
python3 /usr/local/lib/python3.7/dist-packages/evdev/evtest.py
Or, if you still run the Python 2 version (really, please do upgrade), then
python /usr/local/lib/python2.7/dist-packages/evdev/evtest.py
- Note the input device name. You will need it later in your code. Might be something like
'/dev/input/event3'
Mapping your Controller
We will run a simple Python script to filder out the evdev information we need. Basically you are looking for event codes (identifies which button or combination of buttons is pressed) and event values (what are the resulting values of the button presses). The listing below comes from a great article describing a similar thing.
- Run the following code and write down all button presses (code, value)
#import evdev
from evdev import InputDevice, categorize, ecodes

#creates object 'gamepad' to store the data
#you can call it whatever you like
gamepad = InputDevice('/dev/input/event3')

#prints out device info at start
print(gamepad)

#evdev takes care of polling the controller in a loop
for event in gamepad.read_loop():
    print(categorize(event))
Write your Program reacting to your Controller
Now you have to tweak the below code, based on the values you get. However the principle is I think clear. After debugging the below fragment, you are done: you have mapped your controller to your script.
The below is my simplistic VR controller mapping. Tweak it as needed.
from evdev import InputDevice, categorize, ecodes

print("ACGAM R1 - pad mapping")

#creates object 'gamepad' to store the data
gamepad = InputDevice('/dev/input/event0')

#button code variables (change to suit your device)
aBtn = 304
bBtn = 305
up = 115
down = 114
left = 165
right = 163
playpause = 164

#loop and filter by event code and print the mapped label
for event in gamepad.read_loop():
    if event.type == ecodes.EV_KEY:
        if event.value == 1:
            if event.code == aBtn:
                print("A")
            elif event.code == bBtn:
                print("B")
            elif event.code == playpause:
                print("Play/Pause")
            elif event.code == up:
                print("up")
            elif event.code == down:
                print("down")
            elif event.code == left:
                print("left")
            elif event.code == right:
                print("right")
PyBluez
The above code is a bare-bones configuration. In cases, where you want more out of Bluetooth, you might want to install PyBluez. For some time, it is compatible with Python 3. So far, so good. It may be, that installation via pip fails. Check the install script below on how to proceed.
sudo apt-get update
sudo apt-get install python-pip python-dev ipython

sudo apt-get install bluetooth libbluetooth-dev
sudo pip install pybluez
Links
Always read more Python related topics on our main Python page.